


Baking a cake in layers and decorating with a class is quite difficult from an organizational point of view. Still looking for a fun and creative assignment for your group? Fortunately, there is now a nice alternative. Craft a cake on the flat surface using tissue paper. In the end, the cake takes on the style of the popular Blond Amsterdam. Perhaps also a nice idea for a birthday calendar? This assignment is suitable for the middle and upper classes.
Materials:
- A3 bottom sheet (preferably white)
- Various sweet colors of tissue paper
- Glue
- Scissors
- Black fine marker
- Fine brush
- Gold and silver paint
- Possibly glitter or glitter glue
Method for the teacher
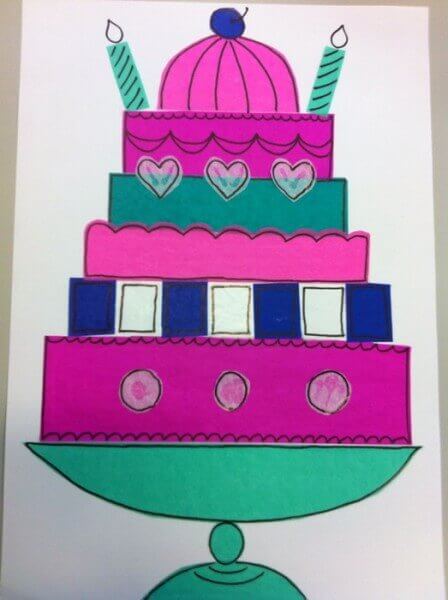
All students receive an A3 paper as a bottom sheet. This will be the basis of the workpiece. The children then choose a number of colors of tissue paper to make the different layers in the cake. Children can optionally also make a bowl on which the cake is presented. The layers of the cake are different in width. The bottom layer is the widest and the layers above it become less and less wide. The shapes of these layers can be different. Think of an edge with short or long arches or a semicircular cake on top. The children then cut decorations from the tissue paper and decorate their cake with it. All kinds of figures can be used: circles, hearts, dots of whipped cream, candles, etc.
When the children are satisfied with their base, they can use a black marker to accentuate the outline of the different layers. It is not necessary to work very precisely, the sloppy gives a playful effect. Other details and decorations are applied with a fine brush and silver or gold paint. Optionally, the cake can then be decorated with glitter (glue).
Easier and harder
This assignment can easily be adapted in difficulty by making more or less demands on the work. Children who find it difficult to freehand cut a figure can first draw it on the paper with pencil and then cut it out. Encourage children who have trouble thinking creatively to look at others. Offer images of real cakes and let them get their inspiration from there.
For more challenges, offer a different shape of cake. Think of the topsy turvy models, where the different layers are deliberately placed on top of each other at an angle, or a Swirl cake, where the shapes of the layers are wavy. There are also many difficulties in the decorations. Have the children paint a print on the cake with silver or gold paint.
Tip
- Offer footage. Think of photos of all kinds of delicious fondant cakes, beautiful prints and decorations and some images of Blond Amsterdam. This puts the children in the right atmosphere and gives them ideas to make their own cake as beautiful as possible.
- When children finish earlier or would like to fill in the white spaces of their skin, they can use the same technique to make flowers or butterflies, for example.
Step-by-step plan for the student
- Take a large white sheet and choose some colors of tissue paper.
- Cut out several layers of the cake from the tissue paper. The layers can have different shapes and thicknesses.
- Maybe you can also make a serving dish under your cake? Stick on the layers from wide to narrow.
- Now cut decorations from the tissue paper and stick them on.
- Now make an outline with the black marker around the layers of your cake and the decorations. This does not have to be very precise on the edges.
- Now take a brush and some silver and / or gold paint, make other decorations on your cake.

