


The theme of the Children’s Book Week 2012 is ‘Hello world!’ You can of course go in any direction with that; even all over the world. In this article, some crafting tips and teaching ideas for young children. About how you can live on one mini-piece of the world with many people at the same time, how you can make a new language by putting a specific letter in each word and how you can make a world pizza, a world doll and a world holiday card. Greetings from…
- World doll
- Skyscraper
- a new language
- World pizza
- Greetings from…
Here you will find a digital picture book about pig Hap and haasje Hodde, who race out of their crafted world on a motorcycle with sidecar and end up in the real world: Stop! I don’t have my helmet on yet!
 World doll
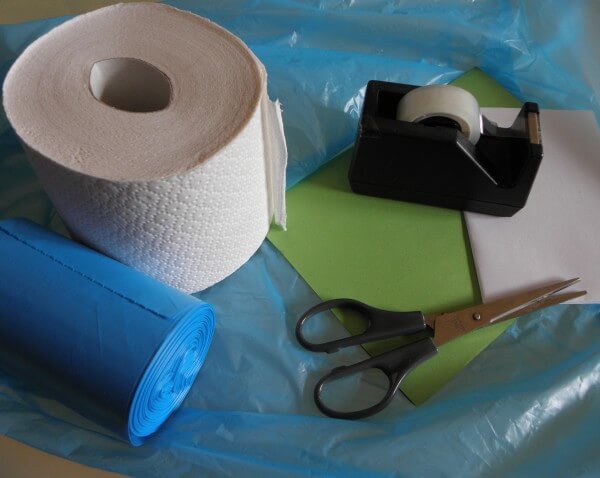
Required: a blue garbage bag, toilet paper or newspaper, colored, green and white paper, adhesive tape, scissors
- Cut a square out of the blue plastic, this can be as large or as small as you want (possibly double if it is very transparent).
- Make a thick wad of toilet paper or newspaper and place it in the center of the square.
- Now wrap the plastic around the wad, pull it nice and tight and wrap a piece of tape around it (the children can do this together; one holds, the other puts tape around it).
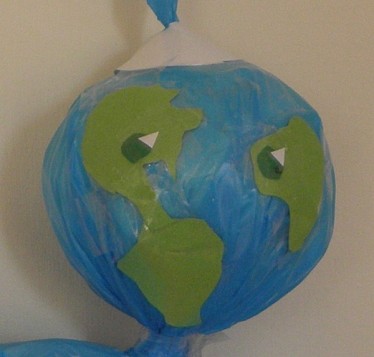
- You should now have a nice blue (earth) sphere and underneath it a triangle of blue plastic remains.
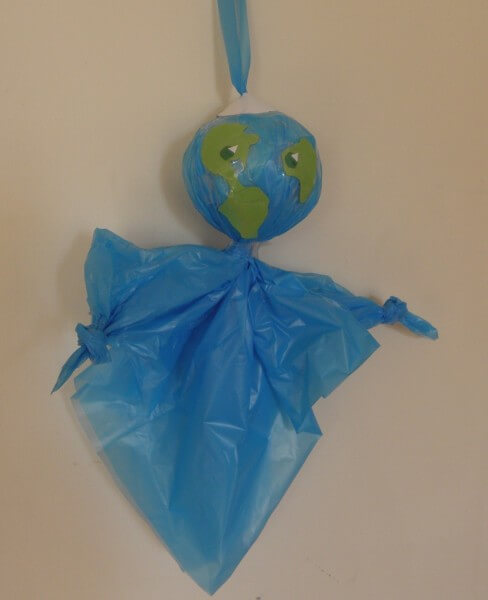
- Tie a knot in the two outermost points, so they look like hands. You could also cut real hands out of cardboard to stick to it.
- Look at a globe or a map of the world to see the shape of the continents. They are not nicely round, so the eyes and mouth of the world doll will not be either! Draw eyes and a mouth with a pencil on green paper and cut out the whimsical shapes. Of course it doesn’t have to be exactly like the real parts of the world and you could also use other colors.
-
 World doll
You can stick them on the face of the world doll with tape or strong glue. To finish the eyes you can stick a dark green dot and a small shred of white in it (see photo).
- You can hang the world doll on a strip of blue plastic; First cut a circle from white paper (outline the lid), cut it in from the side to the middle, fold the strip of plastic in half and stick the ends at the bottom of the white circle with adhesive tape, seal the circle like a Chinese hat and stick it on top of the world. The white hat is the North Pole.
- The children can hang the world dolls around a large yellow sun, but of course they can also make one gigantic world doll together. So big that they can draw mountains, houses and even polar bears on it.
Game: The-prettiest-in-the-world-is …….
Throw the world doll over (or turn it into a world ball). The person who catches may shout out what he / she thinks is the most beautiful in the world and must then throw the doll at another child as quickly as possible. No time to think, just shout out what comes to mind. You could choose different things, for example:
- I think the most beautiful in the world …
- I think the funniest thing in the world …
- I think the scariest thing in the world …
- I think it’s the best in the world ….
- The most expensive..
- The sweetest…
- The hardest
A calmer variant is of course also very possible and more suitable if, for example, you want to discuss ‘the saddest thing in the world I think …’. Then the children can pass on the doll and possibly take turns telling the doll what they think is so sad about the world.
Skyscraper
If you build houses on top of each other, you can live with many people in a tiny part of the world. Handy if there is not enough space to build a house on the ground for everyone. Nice to try out and to show how much space that saves. All children bring a box, agree in advance what size approximately (shoe boxes or tea boxes are both possible, as long as it is agreed, so that all boxes are approximately the same size.).
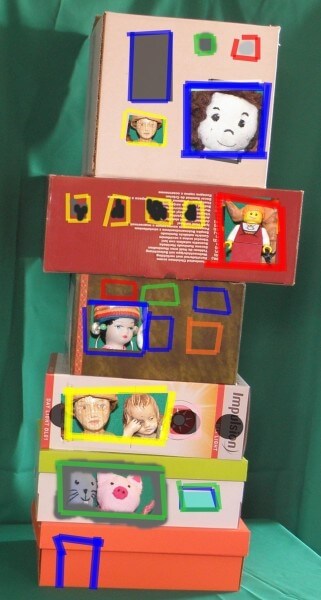
The children can now turn their own box into a house with a flat roof. With star strips they can glue windows around the house in all shapes and colors. They can cut pictures from magazines of people or dolls standing in front of the windows. They can also draw people of course. It’s all about the outside, but if there is a lot of time for this piece of work, it is of course wonderful to make a real house from the inside with rooms, furniture and dolls. Then at least one of the windows must be able to open to be able to peek in later.
When all the houses are ready, the children put them against each other on the floor. They make a border around it with painter’s tape or sidewalk chalk, so that it will soon be clear how much space the boxes take up together. When that is done, the boxes can be stacked in the middle until there is a skyscraper.
In the bottom box a stone (foundation) to make the whole thing more solid. The boxes can be attached to each other with strong glue or tape (double-sided). Maybe cut a few more clouds to stick to the top boxes and the new word ‘skyscraper’ will stick well.
And then look and measure; how much space is left? What could we do with that space? Possibly further tinkering to make parks, zoos, swimming pools, playgrounds, nature reserves, streets or of course many more houses for the empty, remaining space.
a new language
People speak in different languages and sometimes you cannot understand someone. Actually, a language is a kind of agreement between people who live close to each other. The children can try to come up with a new language together; your own class language! For example, if we take the i for i and we put it in every word, it already sounds very different. The children can try this out; they talk to each other in pairs, may say anything, but every word has to have an i. For example, they can tell each other their names, where they live, what they like in the new i-language. “I hit Jisper, I bin vif jir, I win in Amsterdim. Want ji mit mi spelin?” Every name also has an i, Anneke becomes Inneke or Anneki, teacher becomes jif and the play corner becomes the play hiccup, or the pivot corner, the children can make agreements about this. Schoolplin or shell square? Chicken stick or hood? Quite difficult for young children but fun to do!
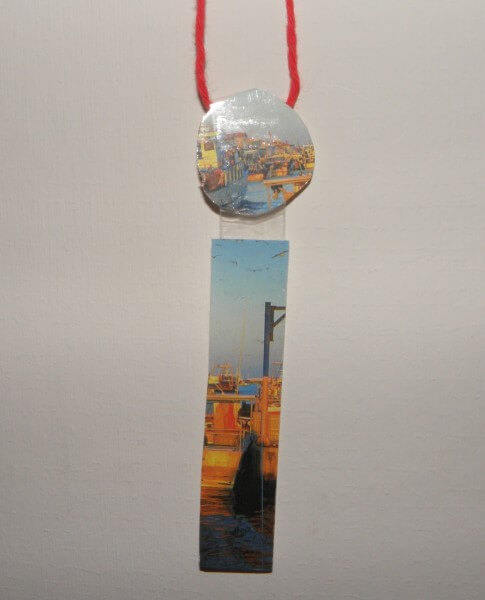 ‘I speak IKS’
Of course, the letter i belongs to the i language. A strip of cardboard becomes the stripe and a blue circle with green spots becomes the dot above it (after all, it is a world language). Also nice to cut the stripe and the dot from a holiday card. With transparent adhesive tape on both sides you can stick the dot above the line, then it looks like it is floating above it. If you stick the letter i to a string with an adhesive tape, you can hang it as a chain. Then everyone can immediately see that you can talk IKS!
If the children have practiced properly, you could invite someone to the class who does not yet speak the i-language. For example, a parent, the neighbor or a child from another class. Of course, they don’t understand anything at first, but when the children explain the i-language, the visitor soon also speaks ‘iks’. The new language is a nice opening to conversations about other languages.
The letter i must always be pronounced as the i of ‘I’ and not as he! You can also choose a different letter or letter combination of course. Keep in mind the difference in sound between the a and the aa, for example; You shouldn’t mix them up too early, because that can be confusing for preschoolers.
World pizza
Make a pizza that everyone in the whole world would like a piece of!
This craft is suitable for young children if there has already been talk of ‘food from different countries’. Cut a circle out of brown cardboard, draw lines down the center with a ruler and cut out the pizza slices. Now you can fill the points with pictures from supermarket folders; a slice of pizza with stew, a slice of spaghetti, a slice of paella, couscous, long beans and so on … (You can also make a clay pizza by rolling over a ball of clay with a rolling pin. Then with a plastic knife the slice the pizza and cover with threads, shreds, wads, beads, etc.)
For older children it is fun to make a world recipe pizza: draw and write on each pizza slice what you need for a specific world dish. You could use a real pizza box as a frame for this pizza artwork; stick the dots on the bottom, cut out a round circle from the lid and paint or stick on it with beautiful letters: ‘world pizza’. If you are scientific, you could find out what is most eaten on our planet. Then you divide the pizza into percentage points and see which food gets the largest pizza slice. Use real grains, er … scales of aluminum foil or, for example, rice grains for a nice effect and a good overview.
Greetings from…
Collect a lot of old postcards from different countries. With all those cards together, the children can create a work of art: a world holiday card. On a large piece of cardboard, first quickly indicate with a pencil a place for the sky, the sea, the beach, the forest, the city. For example: top: strip of sky, left side forest, middle city, right side sea, bottom left grass, bottom middle square (space for statues, terraces and the like), bottom right beach. It should of course not be too precise, just indicate the areas thinly.
The children can now cut parts from the cards into beautiful, pointed pieces, so that they become a kind of mosaic stones. Handy to keep the different pieces, such as ‘air’ or ‘houses’ together in separate containers or to stick them directly. Toddlers need a few examples, especially in the beginning, so that they don’t cut the cards into tiny shreds that can hardly be used anymore. Buildings and objects may be cut out ‘whole’, so that they remain recognizable.
If all goes well, there are buildings in that metropolis from all over the world, it will be warm and cold, day and night and quiet and busy at the same time! Preschoolers can stick people everywhere, for older children it might be fun to use the human figures to make a list or large letters. And for example write in the air at the top; Greetings from…

