


Nowadays there are many people who want to ride their horse bitless. There are many different bitless bridles. One of these is the sidepull noseband. This noseband is on the soft part of the horse’s head. A total of four rings are attached to the sidepull. With these rings the noseband can be attached to the bridle, and the reins can be attached to it.
What is a sidepull?
A sidepull is a bitless bridle with the reins on the side of the nose. The reins are attached a few centimeters above the place where the reins of a bridle with bit are. The cheek pieces, the browband and the throatlatch remain the same as with a normal bridle, so you can also make your self-braided sidepull noseband to your own bridle. Furthermore, you only need a chin strap. It differs per noseband how sharply it affects the horse. A thin, roughly braided noseband provides much more pressure than a thick, soft noseband.
The sidepull noseband has a total of four rings. Two are used to attach the bridle, and the two that are loose, as it were, are attached to the reins.
What do you need?
- Rope, I use 4 mm thick polypropylene multifilament (PPMF)
- Scissors
- A tape measure
- Four equally sized rings
- A lighter
What sizes
To begin with, you need to determine how long you are going to make the sidepull for your horse. You can find out how long your sidepull should be in the table below. These are standard sizes, each horse has different dimensions so you can also measure the required length yourself. You look up your horse’s cheekbone. This is a protruding bone on both sides of the horse’s head. This is about 20-30 centimeters above the corner of the mouth. You will sit about three fingers under this. This is the best place for the noseband. You draw an imaginary line up from the corner of the mouth, also look for this point on the other side of the head. Now you can measure the length between these two points. This is the length of the rope that is needed, so this is measured without the rings.
| Measure | Oversize nose circumference | Required length of rope |
|---|---|---|
| Mini | …- 20 centimeters | 1.20 meters |
| Shetland | 20-23 centimeters | 1.30 meters |
| Pony | 23-25 centimeters | 1.40 meters |
| Cob | 25-28 centimeters | 1.50 meters |
| Full | 28-30 centimeters | 1.60 meters |
| Big horse, draft horse | 30 -… centimeters | 1.70 meters |
Step one
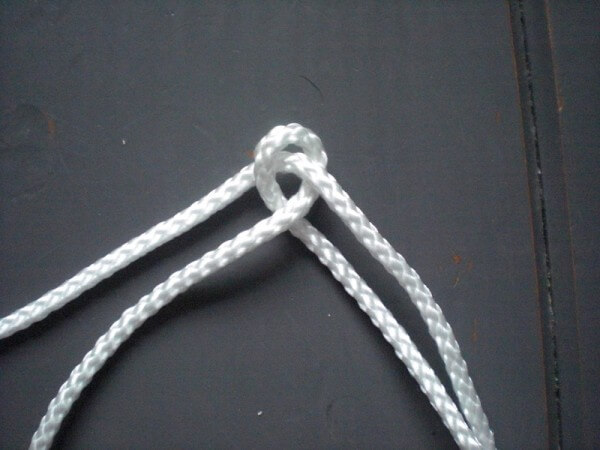
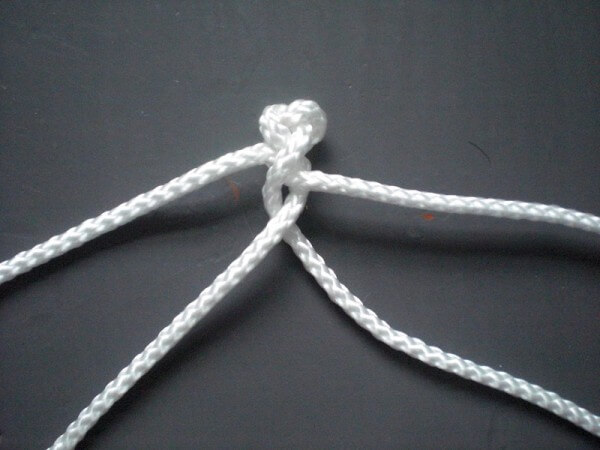
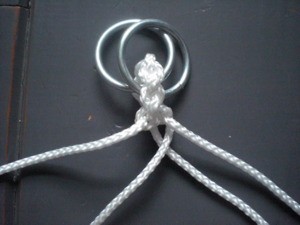
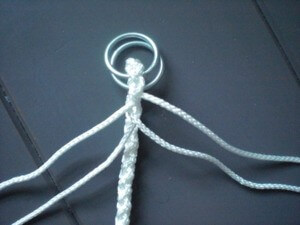
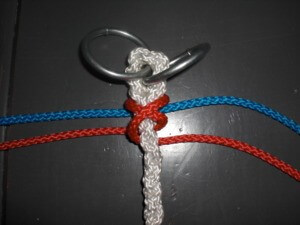
Now you can start. If you want to make a 25 centimeter sidepull noseband you need two ropes of 1.40 meters. Cut these off and fire the ends. This will be the center of the sidepull and it will only be visible on the sides. Keep this in mind in the choice of colors. Now you can start braiding. This is the same technique as with braiding a lead rope (see below under read more). Find the center of the two ropes and place them as shown in the first photo. Then take the leftmost rope and put it between rope 3 and 4. Then you put this rope under 3 and put it between 2 and 3. Then do the same with the rightmost rope. First over the two ropes next to him, and then back under. This can be seen in the second photo. You keep going like this and a braid will soon form.
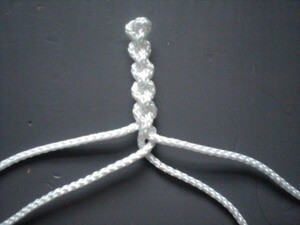
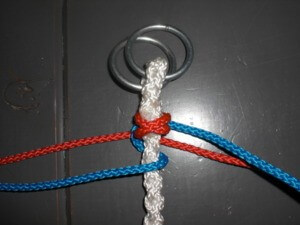
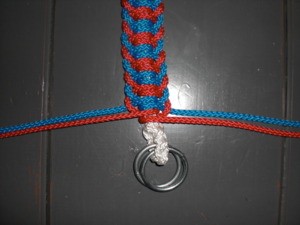
After braiding about 5 centimeters, it is time to get two rings. Put the part of the braid through the jump rings, just like it looks in the photo below. Then make two loops at the beginning of the braid. This can be done with scissors or simply with your fingers. The two outer ropes go through these loops. After this you can just continue braiding.
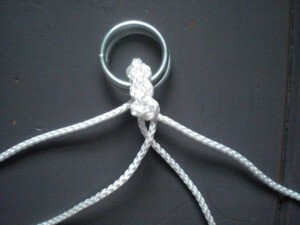
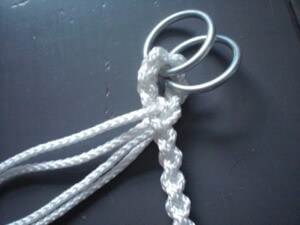
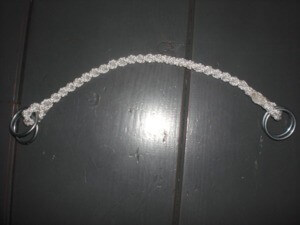
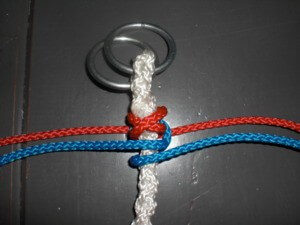
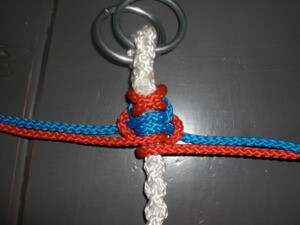
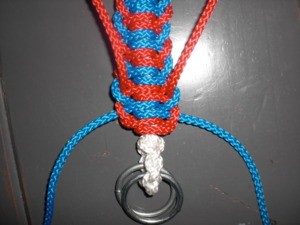
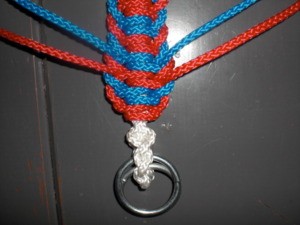
In the first photo the ropes are not yet through the loops, but in the second photo they are. If this is done you can continue braiding. When you think you are almost done braiding you should start measuring. In this situation the sidepull becomes 25 centimeters long. This is the part without rings, so only the rope. After you have measured this length, braid has about 5 centimeters left. Now you can start braiding back. First, take the other two rings there, and put the end of the braid through them, just like in the picture. Then pull open a few loops of the existing braid, and put the ends through each other loop. Put this on well. Now you can cut these ends and burn them shut. Burn this well, the braid should not come loose again. Then you have this result.
If you would like a round sidepull, this is also possible. You then take four ropes instead of two ropes. You braid in the same way as described above, but then you always take two ropes instead of one. This way you are already done with your sidepull noseband!
Step 2
Now you cut two ropes again. These must each be 2.50 meters. You are now going to braid the core. Find the center of the ropes again and place them as shown in the picture below. Then you pick up the left upper thread, place it over the thread underneath, and then you put the thread under the core and back along the top. Do the same with the right top thread.
Continue in this way until the entire core is covered. When you have reached the end you can tie off. Put the bottom thread under the top one and let it come out of the braid through a loop. Do this with both bottom ropes. You can now let the other two ropes come up through another loop at the bottom, just like in the photo. It is important that the ends are on top so that no hard pieces at the bottom of the sidepull can press into the horse’s nose. This can cause chafing spots. Pull the braid tight. When you are satisfied, you can cut the ends of the ropes and then burn them well so that it stays in place.
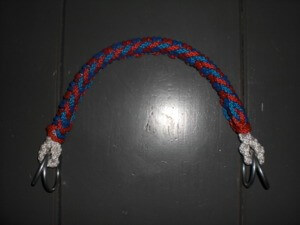
Now your sidepull noseband is off! Due to the thick braid, this sidepull noseband is fairly friendly towards your horse. If you have used stiff material, the noseband can chafe. Pay close attention to this.

